
Seashells are nature’s tiny masterpieces. If you’ve collected them from beach trips or bought a bag from a craft store, you’re sitting on a treasure trove of creative possibilities. Seashell crafts are affordable, relaxing, and surprisingly elegant when done right.
In this guide, you’ll learn practical, beautiful seashell craft ideas that actually look good in real homes — not just on Pinterest boards. Whether you’re a beginner or an experienced DIYer, these projects will help you turn simple shells into décor you’ll be proud to display.
Why Seashell Crafts Are Worth Making
Before diving into projects, it helps to understand why seashell crafts remain popular year after year.
They’re beginner-friendly. Most projects require basic supplies like glue, paint, and twine.
They’re budget-friendly. If you already have shells, your main cost is time and a few craft materials.
They suit many styles. From coastal farmhouse to minimalist décor, seashell crafts can be customized easily.
They’re relaxing to make. Sorting and arranging shells has a naturally calming effect — almost like a form of art therapy.
Now, let’s move into the fun part: what to actually make.
1. Seashell Picture Frames

One of the easiest and most beautiful ways to use shells is by decorating a picture frame. This project works great for beginners and makes a thoughtful handmade gift.
What You’ll Need
- Plain wooden or plastic photo frame
- Assorted seashells
- Strong craft glue or hot glue gun
- Acrylic paint (optional)
- Small pearls or beads (optional)
How to Make It
Start by cleaning your shells. If they came from the beach, soak them in warm water with a little vinegar and let them dry completely.
Next, plan your layout before gluing. This step makes a huge difference. Arrange larger shells first, then fill gaps with smaller ones.
Apply glue in small sections and press shells firmly onto the frame. Work slowly to keep everything aligned.
If you want a polished look, lightly dry-brush white or gold paint over the shells after the glue dries.
Pro Tips
- Mix different shell sizes for depth.
- Avoid overcrowding — negative space looks elegant.
- Seal with clear spray for durability.
2. Seashell Wind Chimes
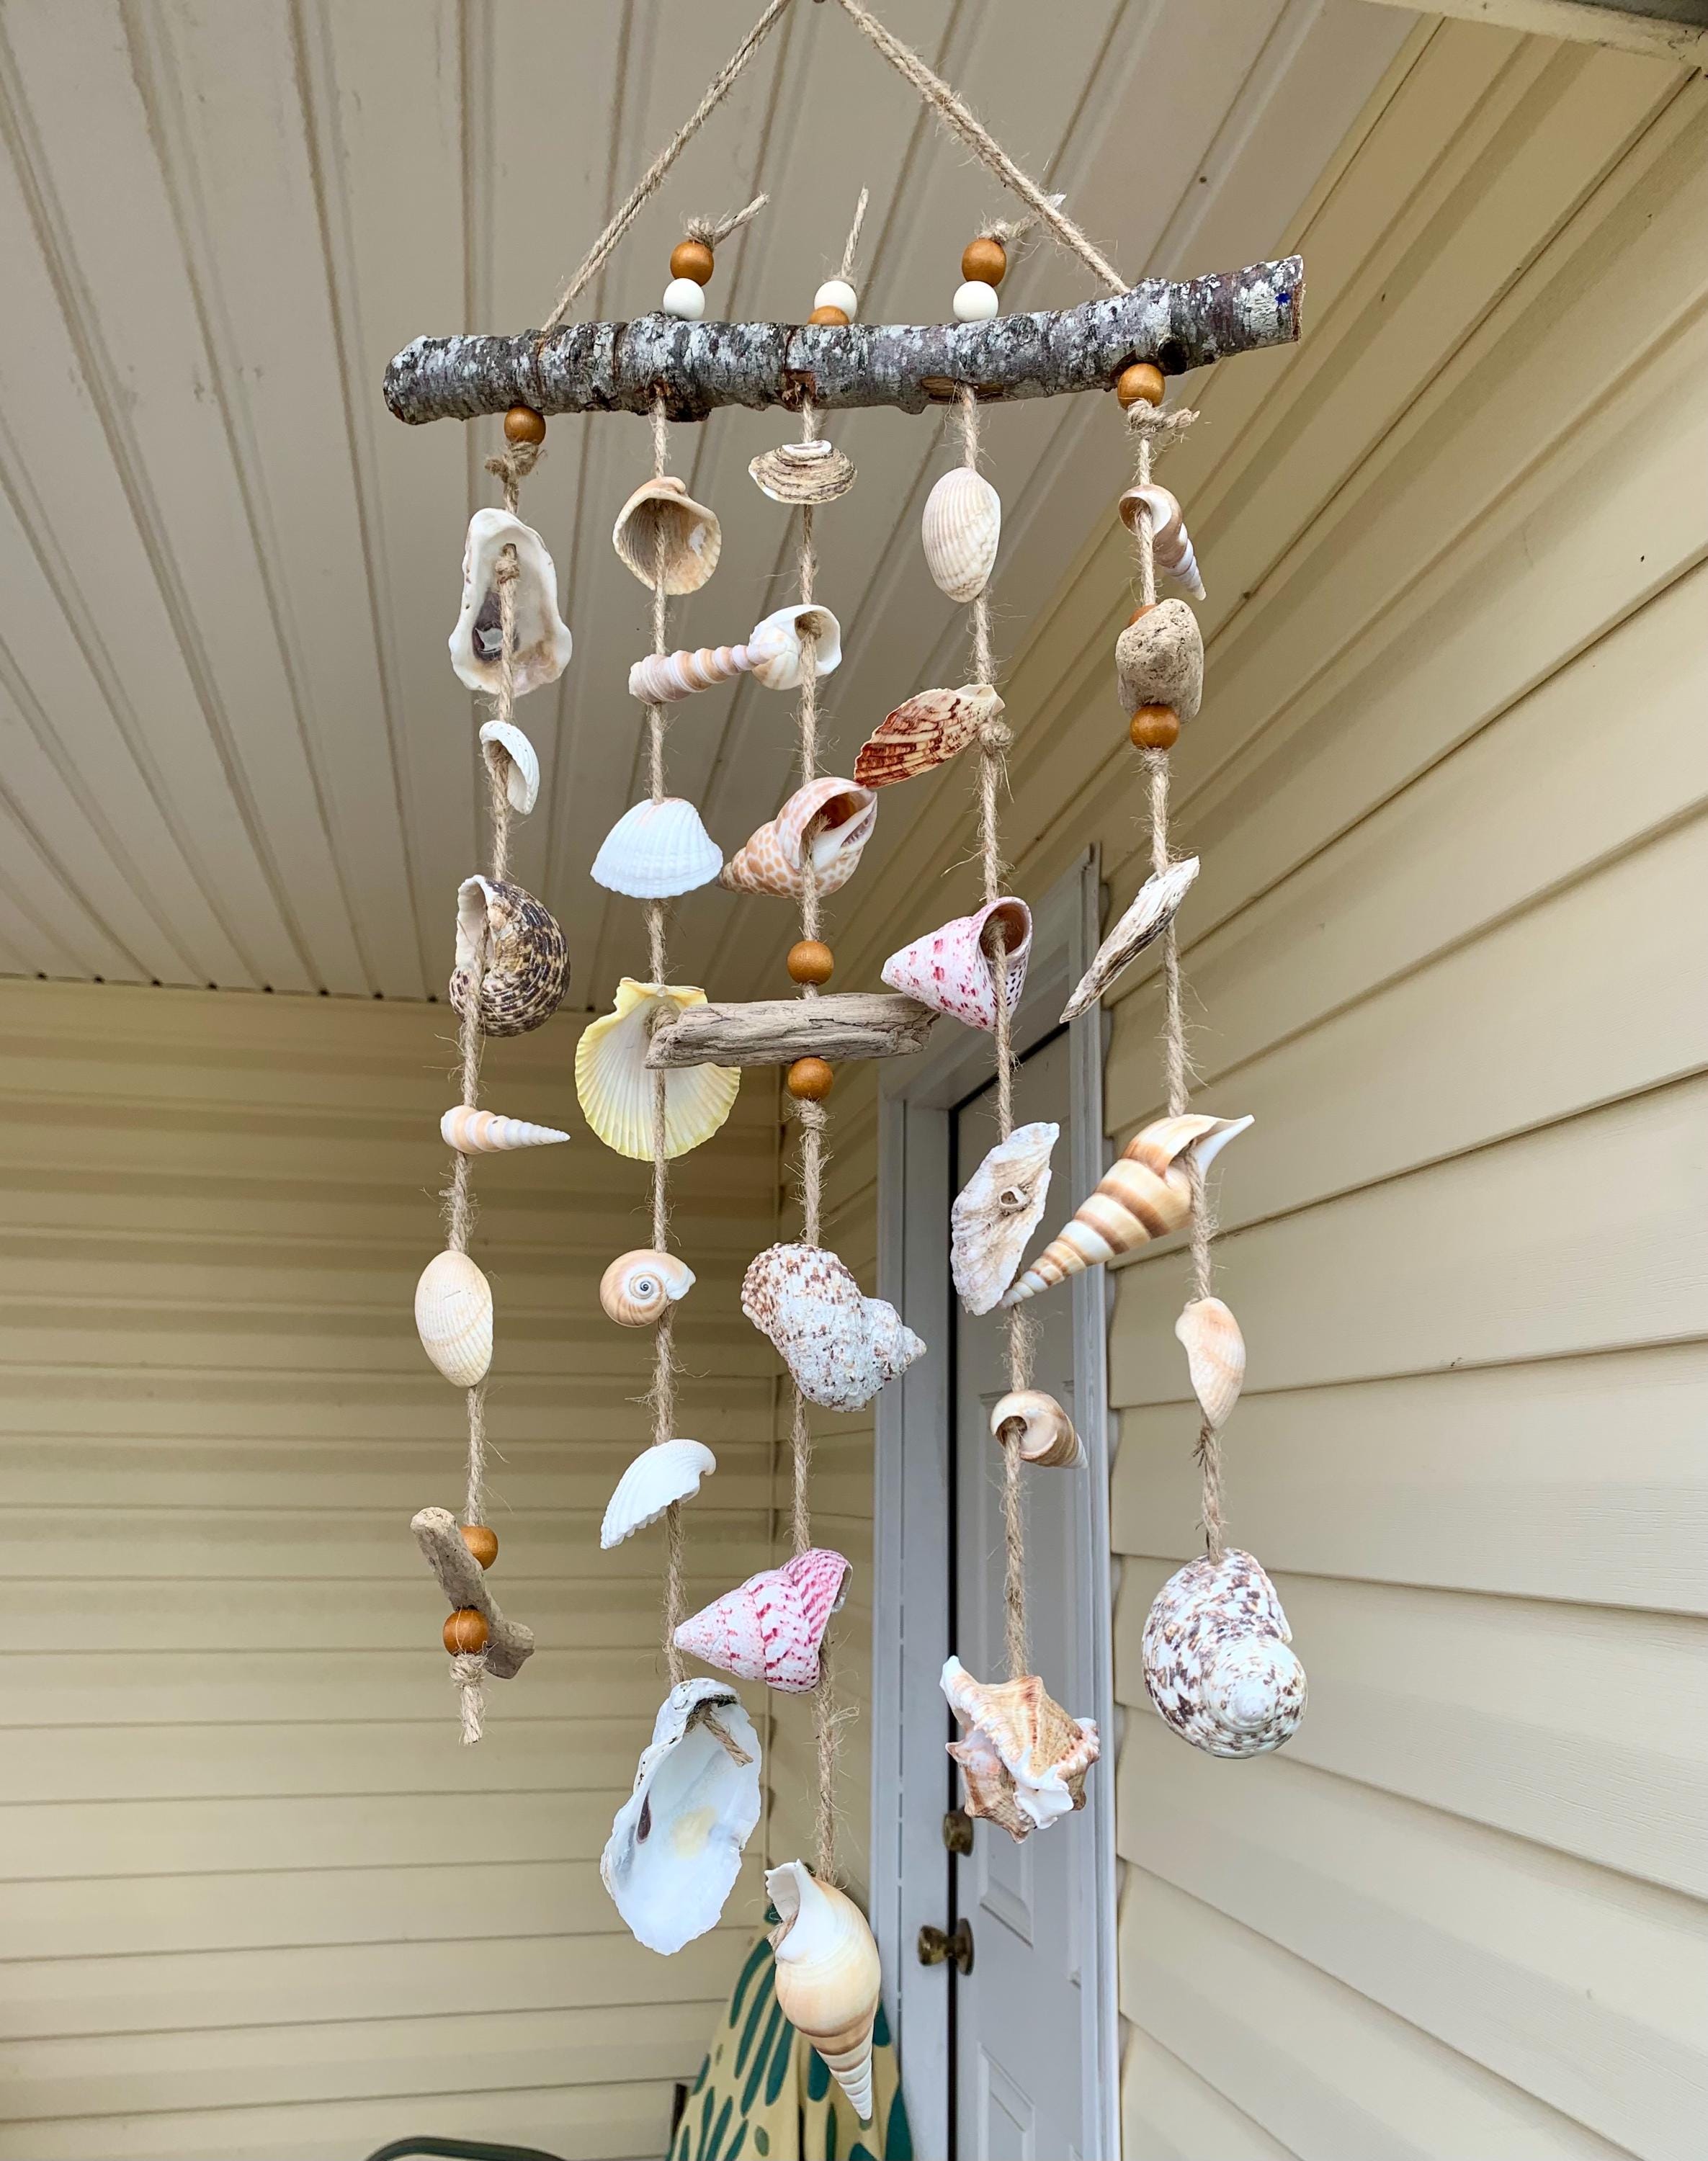
If you want something that moves and makes gentle sound, seashell wind chimes are a fantastic choice. They add a soft coastal vibe to balconies, patios, or windows.
Supplies Needed
- Seashells (preferably with natural holes)
- Fishing line or strong thread
- Small drill or heated needle
- Driftwood or stick
- Beads (optional)
Step-by-Step Process
First, make holes in shells that don’t already have them. Use a small hand drill or carefully heat a needle and press through.
Cut several lengths of fishing line. Tie shells at different intervals to create a cascading effect.
Attach the top ends to a piece of driftwood or a sturdy stick. Space them evenly.
Finally, add a hanging loop at the top and test the balance.
Make It Look Professional
- Use clear fishing line for a floating effect.
- Vary shell lengths for better movement.
- Add small beads between shells for extra charm.
3. Decorative Seashell Candles
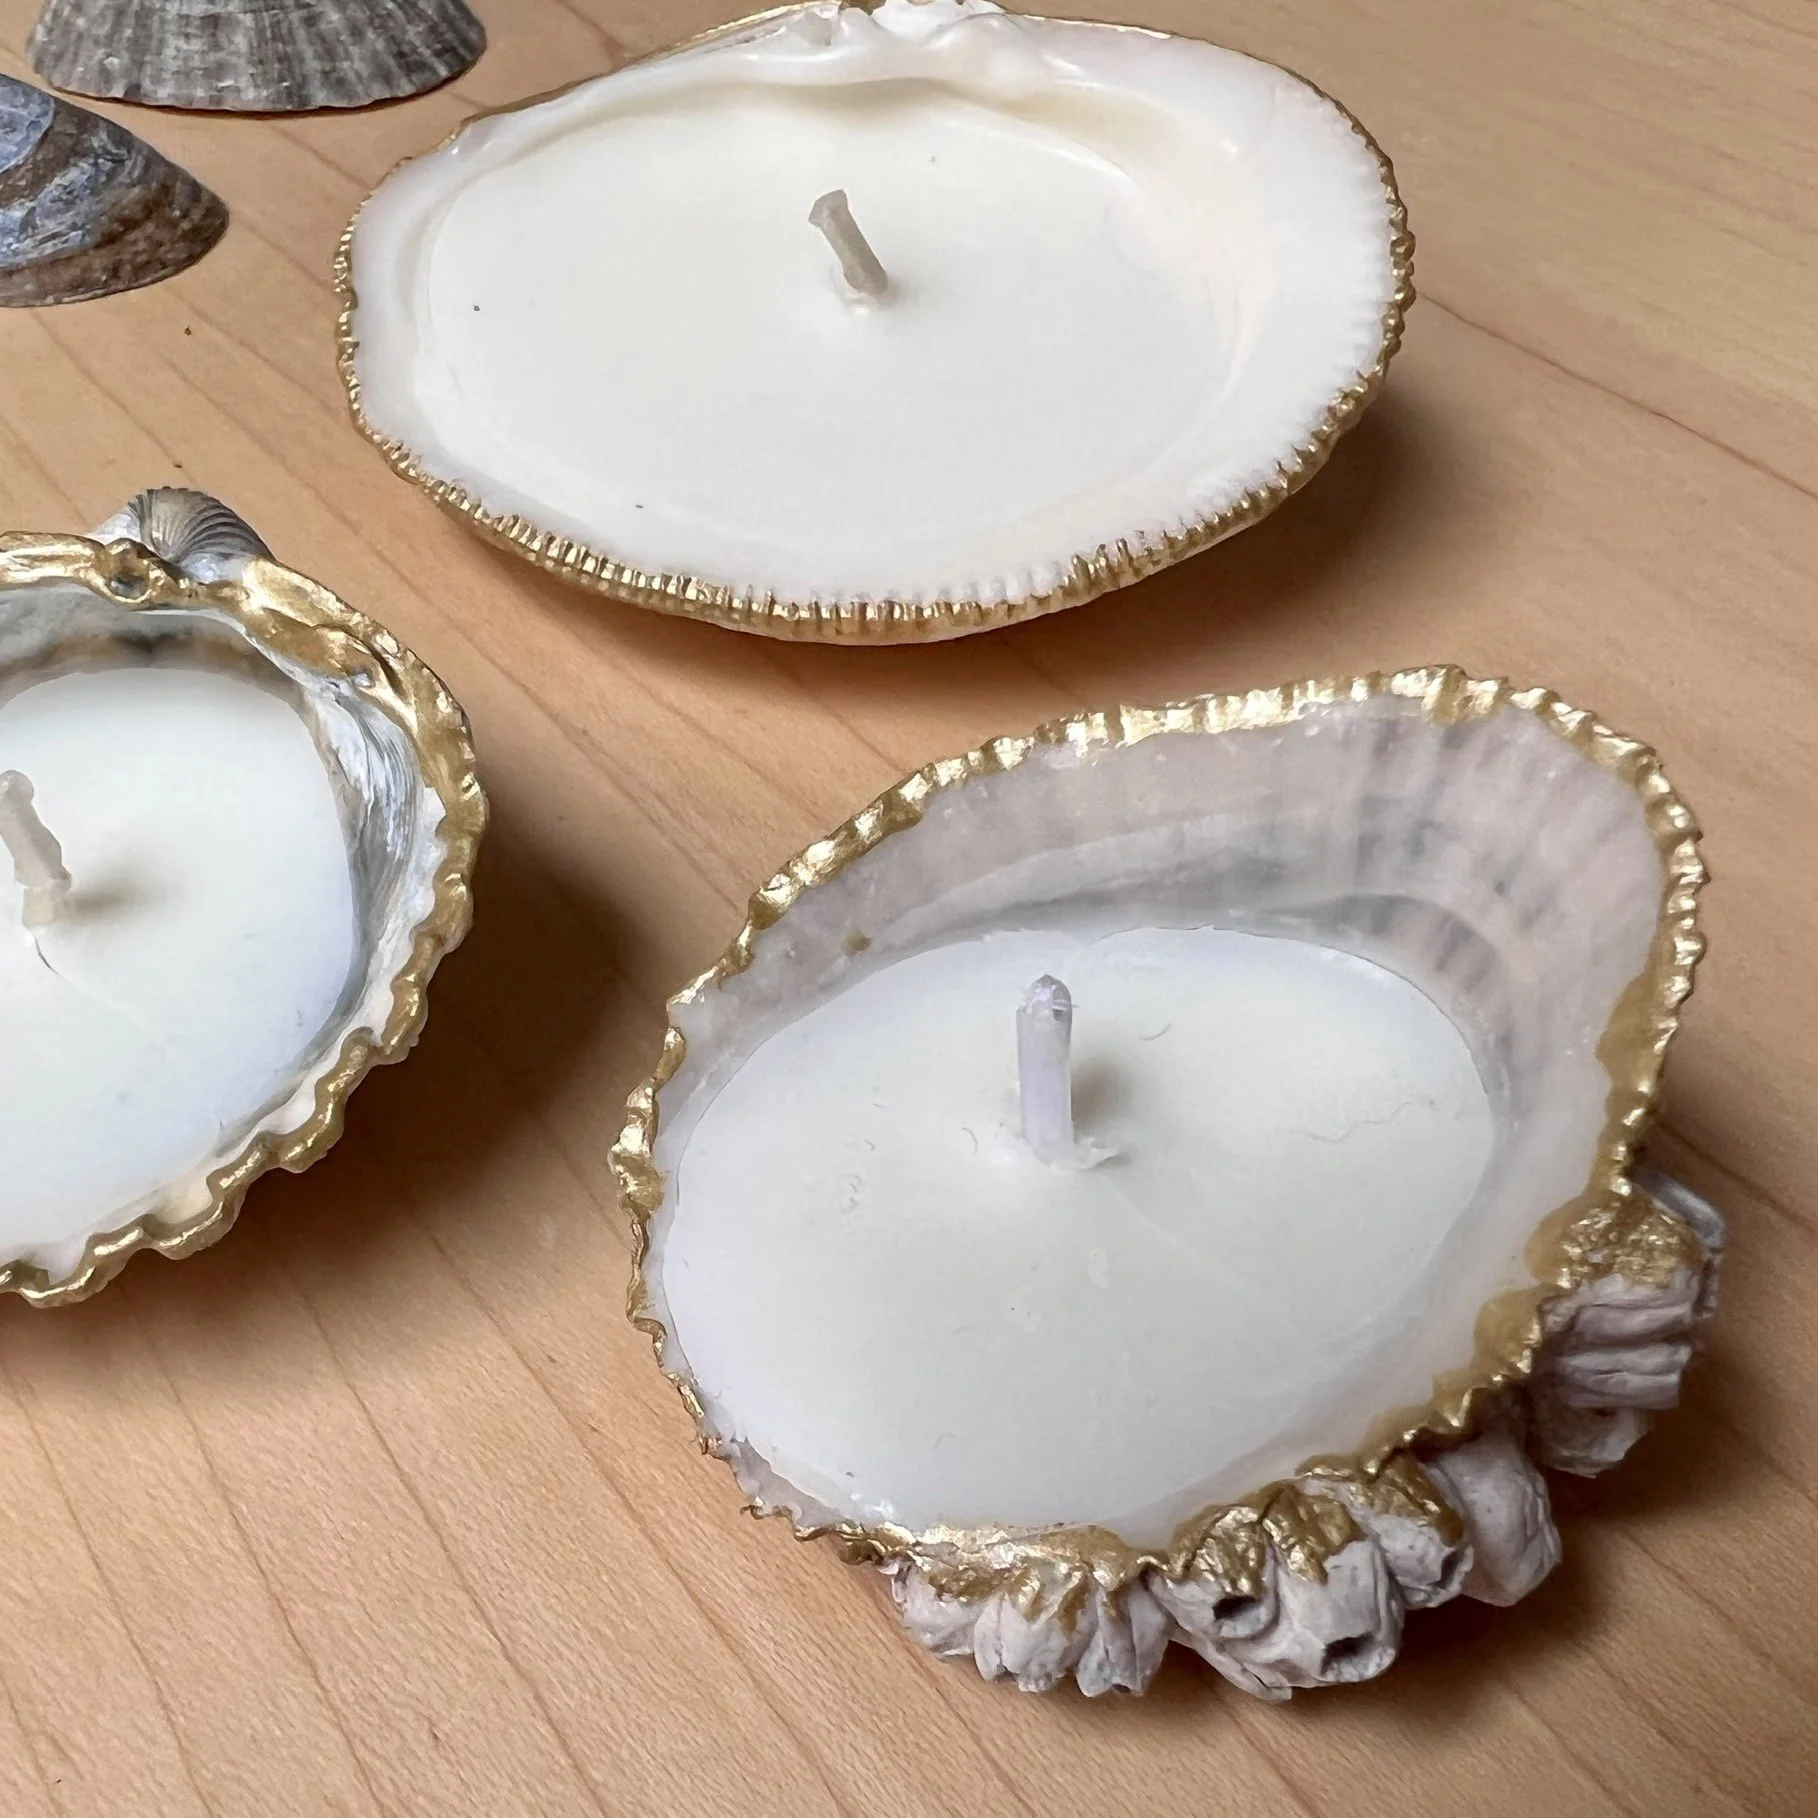
This craft looks far more expensive than it actually is. Seashell candles are perfect for table décor, gifts, or spa-style bathrooms.
Materials
- Large clam shells or scallop shells
- Candle wax flakes
- Candle wicks
- Essential oils (optional)
- Double boiler or heat-safe bowl
Instructions
Start by securing the wick inside the shell using a drop of melted wax.
Melt the candle wax slowly using a double boiler. If desired, add a few drops of essential oil for fragrance.
Carefully pour the wax into the shell while holding the wick upright.
Let the candle cool completely before trimming the wick.
Safety Notes
- Never leave melting wax unattended.
- Keep wick centered while cooling.
- Place finished candles on heat-safe surfaces.
4. Seashell Wall Art

If you have a large shell collection, wall art is one of the best ways to showcase it. This project can be simple or highly detailed depending on your skill level.
What You Need
- Canvas or wooden board
- Variety of seashells
- Strong adhesive
- Pencil for sketching
- Paint (optional)
How to Create It
Begin by sketching a simple design on your canvas. Popular options include:
- Hearts
- Starfish shapes
- Abstract patterns
- Initial letters
Lay out shells along the sketch lines first. Once satisfied, glue them down section by section.
Let everything dry fully before hanging.
Design Tips
- Stick to a limited color palette for a modern look.
- Combine sand texture paint in the background for depth.
- Frame the finished piece for a gallery feel.
5. Seashell Jewelry (Quick but Beautiful)
Seashell jewelry is perfect if you want something wearable and giftable. Even beginners can make elegant pieces in under an hour.
Easy Ideas to Try
Shell Necklaces
Attach a single pretty shell to a cord or chain. Minimal and trendy.
Shell Earrings
Use small matching shells with earring hooks.
Shell Bracelets
Mix tiny shells with beads on elastic string.
Helpful Tips
- Choose lightweight shells for comfort.
- Seal with clear varnish for shine.
- Use jewelry pliers for secure loops.
6. Seashell Planters for Succulents
Want something trendy and Instagram-worthy? Seashell planters are surprisingly cute and perfect for small succulents.
Supplies
- Large shells
- Small succulents or air plants
- Potting mix
- Glue (if mounting)
How to Make
Fill the shell with a small amount of soil. Plant your succulent gently and press the soil around it.
If the shell is shallow, air plants work even better because they don’t require soil.
Place on desks, window sills, or coffee tables.
Important Note
Succulents need drainage. If your shell has no hole, water very lightly to avoid root rot.
7. Coastal-Themed Mason Jar Décor
This craft combines shells with jars to create soft beach-style lighting.
Materials
- Mason jar
- Small seashells
- Twine or rope
- Fairy lights or candle
- Glue
Steps
Wrap twine around the jar neck and secure with glue.
Glue small shells randomly around the jar or just near the base for a cleaner look.
Place fairy lights inside for a warm glow.
How to Prepare Seashells Before Crafting
Many people skip this step — and their crafts suffer because of it.
Clean Them Properly
Soak shells in:
- Warm water
- A splash of vinegar
- Mild dish soap
Scrub gently with an old toothbrush.
Remove Odor
If shells smell:
- Soak in a 1:1 water and bleach solution for a few minutes
- Rinse thoroughly
- Air dry in sunlight
Add Shine (Optional)
Rub lightly with:
- Mineral oil
- Baby oil
- Clear craft sealer
This brings out natural colors beautifully.
Common Mistakes to Avoid
Even simple seashell crafts can go wrong. Watch out for these.
Using weak glue
Regular school glue often fails. Use hot glue or heavy-duty craft adhesive.
Overcrowding designs
Too many shells can make projects look messy. Leave breathing space.
Skipping layout planning
Always arrange first, glue second.
Not cleaning shells
Dirty shells can smell and prevent glue from sticking well.
Best Tools for Seashell Crafting
Having the right tools makes the process smoother.
- Hot glue gun
- Small hand drill
- Jewelry pliers
- Clear fishing line
- Acrylic paints
- Clear sealant spray
You don’t need everything at once. Start simple and build your kit over time.
Creative Styling Ideas for Display
Once your crafts are finished, presentation matters.
home décor:
Group seashell items in odd numbers (3 or 5) for a designer look.
gifts:
Pair shell crafts with beach-themed wrapping.
selling:
Use neutral backgrounds in photos — white, sand, or light wood works best.
Final Thoughts
Seashell crafts are one of the easiest ways to bring coastal beauty into your home without spending much money. With just a handful of shells and basic supplies, you can create pieces that look handmade in the best possible way — not cheap or cluttered.
Start with a simple project like a picture frame or candle. Once your confidence grows, move into wall art or wind chimes.
The key is simple: plan your layout, keep designs clean, and let the natural beauty of the shells shine.